
The rule of thirds is applied by aligning a subject with the guide lines and their intersection points, placing the horizon on the top or bottom line, or allowing linear features in the image to flow from section to section.
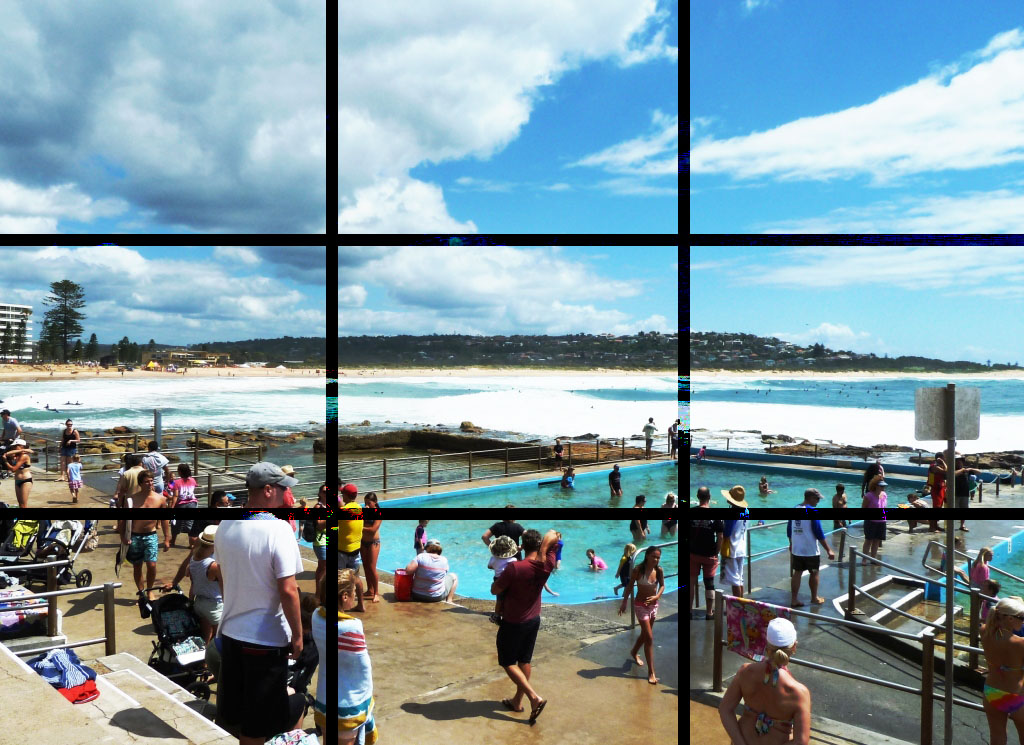
The theory is that if you place the point(s) of interest at the intersections, or along the lines you will have a better balanced image and the viewer will interact more naturally. With the photo above you can see that the main figures in this image are more or less in the bottom left sector and the main interest is in the lower half of the photo. I should have balanced the image though by having the horizon along the upper horizontal line.

In learning how to use the rule of thirds (and then to break it) the most important questions to be asking of yourself are:
- What are the points of interest in this shot?
- Where am I intentionally placing them?
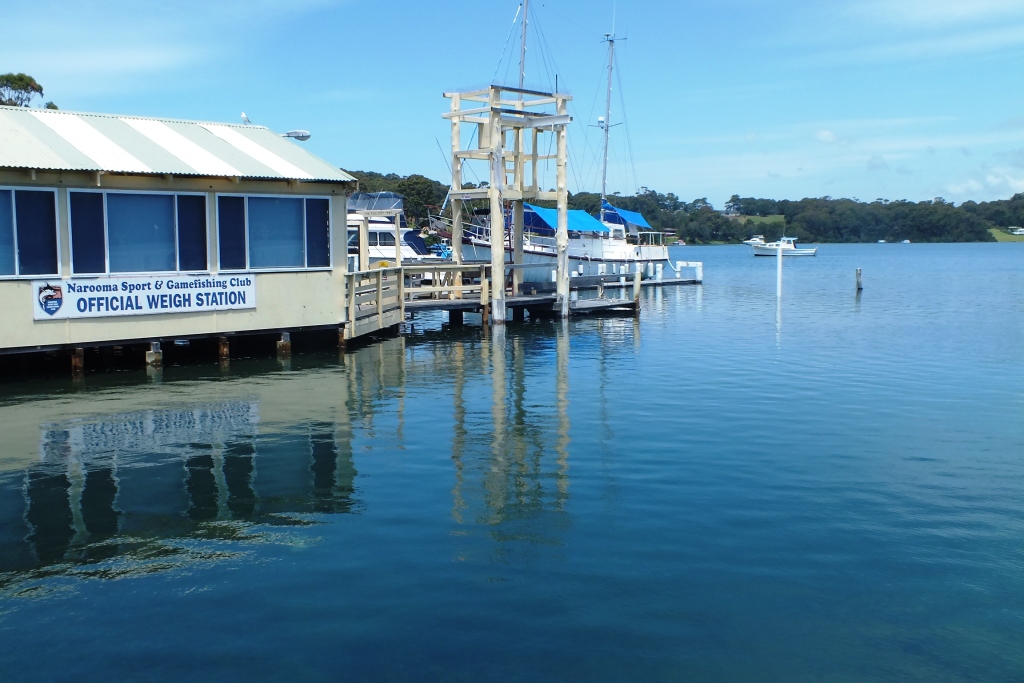
Sometimes it will be necessary to use cropping and editing to re-frame the image so it fits the rules as I have done with the photo below. I liked the pelican and the jetty posts, but felt that the photo was uninteresting overall.
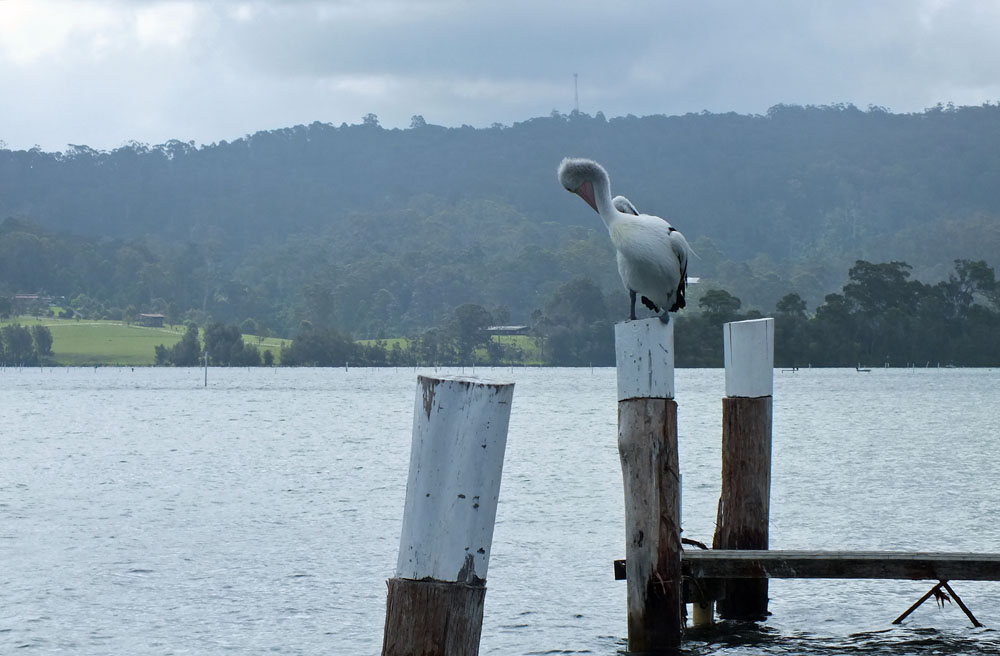
To my eye there was too much unnecessary space on the right of the shot. I wanted to balance the pelican in line with the intersection on the right with its head and beak on the upper horizontal line.

So I did a little cropping from the left and right-hand sides to align the pelican and the post and because the background was a little dull I also converted it to black and white and upped the contrast slightly. Hopefully this has resulted in a better balanced and more interesting image.

When taking a close-up or macro shot you might also find yourself with a lovely bokeh background, where the out-of-focus parts are aesthetically blurred, but the subject is sharp. Again, think of the rule of thirds as to where you position your subject.

Rules are of course meant to be broken, but it is worthwhile understanding the ‘rules of thirds’ first so that you understand why you want to break the rule.
 This creative plate of food is more or less centred in my photograph. The reason for this is because I want you to focus on the food, and this composition felt right to me. I often shoot on instinct and although I have the idea of the ‘rules of thirds’ in my head I also consider the subject, the light and how I want to ‘frame’ the image.
I hope you find this useful and if you have any additional information to add then please do so in the comments. I’m not a ‘technical’ photographer so I have explained this in very simplistic terms.

wow – Paradise – elegant and remarkable images!
Thank you for liking what you see 🙂
A better explanation than given in the challenge post with better photographs.
I did think the challenge was a little misleading – more to do with bokeh than rules of thirds, but I hope I have explained both elements of photography in simple terms. (I only know simple terms!)
You did well.
Thank you. I have just had a look at your blog and feel quite humbled. Your photos are very special.
Thank you.
Thank you for the instruction, Jude. My favourite of your shots is the second one. Could it be the boats? 🙂
Ah, I should have known and that’s Meg on the jetty – we went on a boat cruise around this water inlet which was really lovely and peaceful. Even spotted a sea eagle, but my photo was not impressive 🙂
I’ll have to have another look! Never thought about Meg 😦
That’s so creative! awesome 🙂
Aw, thank you Andy 🙂
Cheers! 🙂
That took me back to my earliest days of serious photography, in the early 1980s. I abandoned the rule early on, unless it was for beach scenes and some landscapes. Even then, it didn’t always work for me. Strangely enough, I still use ‘grid view’ in my digital SLR, something I had to pay extra for, in my 35mm camera, as a viewfinder insert screen. It became a habit to have the grid, even if I didn’t always use it to the letter of the ‘law’.
Good post Jude, instructive for many.
Regards as always, Pete. x.
I think I have always avoided ‘centring’ the subject by instinct without knowing about the ‘rules’. But I guess for a beginner photographer it is useful to be aware that altering the position of your subject can change the perception of the viewer. I don’t use a grid on my camera. I shall have to see if I have one I can turn on!
Thanks for the comment Pete 🙂
Most modern SLR cameras include it in the menu options somewhere. I still like to have it, and find it useful for levelling and horizons. If you can’t see it on the camera, I am sure that you can find out how to activate it by searching on the web. There is very little that is not online these days-fortunatelyx
My camera is a bridge, but does have an auto-levelling thingy, which is very useful 🙂
I am impressed, especially by; that rules are there to be broken. I suppose, an instinct of what looks good and interesting in any visual art is helpful too.
Instinct is probably the most important aspect and one that is least able to be taught. But I do believe practice helps. I consider my images much more now than just snapping away.
I don’t have a grasp of what it takes for good photographs. I’ll just enjoy all of yours. 😛 😛
Whatever makes you happy Tess 🙂
😀 😀 😀 I DO enjoy your pictures, Jude.
Oooh, I know where the first photo was taken! I’ve been there.
Great explanation Jude. I need to play with my new camera more to get the bokeh background thingy happening!
The header photo?
No, the first one in your story. Is the header Bondi?
Header is the Blue Pool in Eurobodalla region. The first image is the pool at Dee Why.
Ha! I was wrong. It looks just like Coogee!
I didn’t make it to Coogee… 😦
The lens gives the bokeh effect, by using the widest aperture on headshots or close ups. Some new cameras have a menu option to choose this effect, but it can be experimented with by using apertures like f2 or below . This article from Nikon explains it well. Scroll down to the text for information.
http://www.nikonusa.com/en/Learn-And-Explore/Article/h0ndz86v/bokeh-for-beginners.html
I had a play with my camera this afternoon but I couldn’t go below an aperture of f3.5. I need to read the manual again. I will look at your link too. Thanks for sharing.
Depending on the lens, it may not have a larger aperture than f3.5 This often applies to zoom lenses, and those on some bridge cameras. It should be marked around the lens, in small type. Something like f3.5-f4.5, or similar. Hope that helps.
I will investigate more. I remember reading about it in the camera manual too.
My camera is a bridge camera and the lowest aperture is f4.2
To be honest I nearly always use an auto mode of which there are several and I do alter the ISO and white balance sometimes. I find that I get the best Bokeh effect when I take a photo from a distance and zoom in on the subject, rather than doing anything fancy with the camera! I sometimes feel that I should understand my camera settings more, but I’m usually happy with my results and IMO that’s what counts 😀
I’m a bit the same way. I’m no expert and usually the auto settings get the result I’m after. What is a bridge camera? ( see, I told you I’m not an expert…I know nothing!)
a bridge camera is more than a compact but less than a DSLR so it has a lot of features and a decent lens and zoom range. The lens is permanently attached and the camera is too big to fit into your pocket. I find it easier to hold than a compact.
Hmm, I’m thinking my new Panasonic TZ60 is a bridge camera. It has some great features and a fantastic zoom. But it is very small and light…perfect for the kind of photography I do. All the Tokyo photos were taken with it and I’m very happy with how they turned out.
Yours is a compact camera – one that fits in the pocket. We have two earlier versions of that – not as good a zoom, but terrific cameras. The Panasonic uses Leica lens which are very good. You have the 30x zoom which my Fuji has which I like as you can get in quite close for detail shots. My camera is more like a DSLR size which I find easier to hold.
I’m thrilled with it, especially because it is so small and light. When we are travelling I just carry it on a strap around my neck so it’s there any time I want to take a photo. I have been very happy with the photos I’ve taken and I did spend some time working my way through the manual, but I need to do that again before our next trip.
I’ve saved this site to my favourites for future reference. Thanks again.
Jude – I really enjoyed this post and THANKS for your feedback on the comment with ray – it helped me to learn a bit more – and I wish I would have read your post here earlier today too – but I was too focused on the benches at that time….
anyhow, I did a bit more reading up on the ratio and golden mean Ray was referring to and found that I disagree with his opinion even more. He was making it much more complicated than it had to be… and the bottom line is that the role of thirds is not the same as Phi grid….
“When applied to photography, this (Fibonacci )ratio can produce aesthetically pleasing compositions that can be magnets for the human sub-conscious. When you take the sweet spot of the Fibonnaci Ratio and recreate it four times into a grid, you get what looks to be a rule of thirds grid. However, upon closer inspection you will see that this grid is not an exact splitting of the frame into three pieces. Instead of a 3 piece grid that goes 1+1+1=frame, you get a grid that goes 1+.618+1=frame.
(more here: http://digital-photography-school.com/divine-composition-with-fibonaccis-ratio-the-rule-of-thirds-on-steroids/)
At the end of the day it’s what YOU like that counts. I didn’t know about Fibonacci’s Ratio as a tool for composing photos. Sometimes an image can be just as pleasing having the subject slap bang in the centre!
hear, hear!
❤
Very good explanation and photographs. I agree, it comes naturally when you’ve been shooting for a long time, but for many, it is not an intuitive idea. Well done.
Thanks Jane, I’m glad my explanation makes sense!