June’s theme / technique: Being Creative with DOF
If you want to see what this month’s assignments are in advance then please click here. All the assignments are available from the menu on the left under the 2020 Photo Challenge / Assignments.
The six visual keys to a great photograph are:
-
- Patterns
- Texture
- Lines
- Colour
- Depth of field
- Space
-
OK so first of all what is Depth of Field?
A basic definition of depth of field is: the zone of acceptable sharpness within a photo that will appear in focus. In every picture there is a certain area of your image in front of, and behind the subject that will appear in focus.
Using a shallow depth of field is a good way to make your subject stand out from its background and is great for portrait photography and wildlife photography when you don’t want the background to distract from your subject.
If you are a person who likes to photograph landscapes you would want everything from near to far to be in focus. This is known as a deep depth of field where we want to see as much detail as possible.
Now for the technical bit where your eyes will glaze over…
Depth Of Field – deep field vs shallow field (high f stop f/22 vs low f stop f/1.8).
-
- The lower the f/stop—the larger the opening in the lens—the less depth of field—the blurrier the background.
- Likewise, the higher the f/stop—the smaller the opening in the lens—the greater the depth of field—the sharper the background.
Aperture refers to the access given to light from the lens to the camera sensors. The size of your aperture (the diameter of the hole through which light enters the camera) controls the amount of light entering your lens. Using the aperture priority mode (the f-stop) of your lens is the simplest way to control your depth of field as you set up your shot and you can leave the rest of the decisions to the camera.

Lens focal length tells us the angle of view—how much of the scene will be captured—and the magnification—how large individual elements will be. The shorter the focal length, the wider the angle of view and the lower the magnification.
Ok. Are you still with me?
I’ll freely admit that although my logical brain understands all this, my practical brain doesn’t. I’m lazy and rely on my camera and the lenses to make the decisions for me. I will attempt to use the aperture settings on my camera this month to take the photos, but I won’t guarantee what the shots will look like!
My Camera Equipment
How to achieve a Shallow Depth of Field
Use any of these tips as an exercise to get up close to your subject.
-
- Widen your aperture to f/1.8 or even f/1.4 if you can, (some camera lenses such as a kit lens may not allow you to go less than f/3.5)
- Physically move closer to the subject and focus on a small area.
- Lengthen your focal length (zoom in / close-up). If your camera came with an 18-55mm f/3.5-5.6 lens, then you know that the widest your lens can go is 18mm and the most zoomed in your lens can go is 55mm.
For getting in closer still you probably need a macro lens. It is a way to examine even a common object in a new way and observe its finer details. And the difference between Macro photography and a close-up? Well a close-up image will fill the frame and can generally be done using any type of lens including cameras with a macro setting. Macro photography on the other hand, although a form of close-up, is usually only achieved using a special (and expensive) macro lens. A macro shot, allows for bigger magnification and shows the finest detail in focus. A real macro lens has the capability of achieving in the least a 1:1 magnification.
How to achieve a Deeper Depth of Field
Use a smaller lens opening or a higher number (f-stop or aperture). You can also achieve this effect by using a wider angle lens which inherently have greater depth of field (e.g. 14 – 35mm).
Use any of these tips as an exercise to get up further away from your subject.
-
- Narrow your aperture (larger f-number)
- Physically move farther from the subject
- Shorten focal length (zoom out) If your camera came with an 18-55mm f/3.5-5.6 lens, then you know that the widest your lens can go is 18mm and the most zoomed in your lens can go is 55mm.
There is also a rather good article explaining the differences with examples here
This week's assignment - Take three images of a chosen subject at three different aperture ranges. Low (shallow like f/1.8), medium (intermediate like f/5.6) and high (deep like f/11). Which photo pleases you the most. Why is that?
If you are still confused about using Aperture Priority Mode, then simply use a zoom lens or camera with zoom settings and select three different focal lengths. Or use three different lenses with various f-number settings. What we are aiming for here is a comparison with f/1.8, f/5.6 and f/16 or whatever the lowest and highest range is available to you.
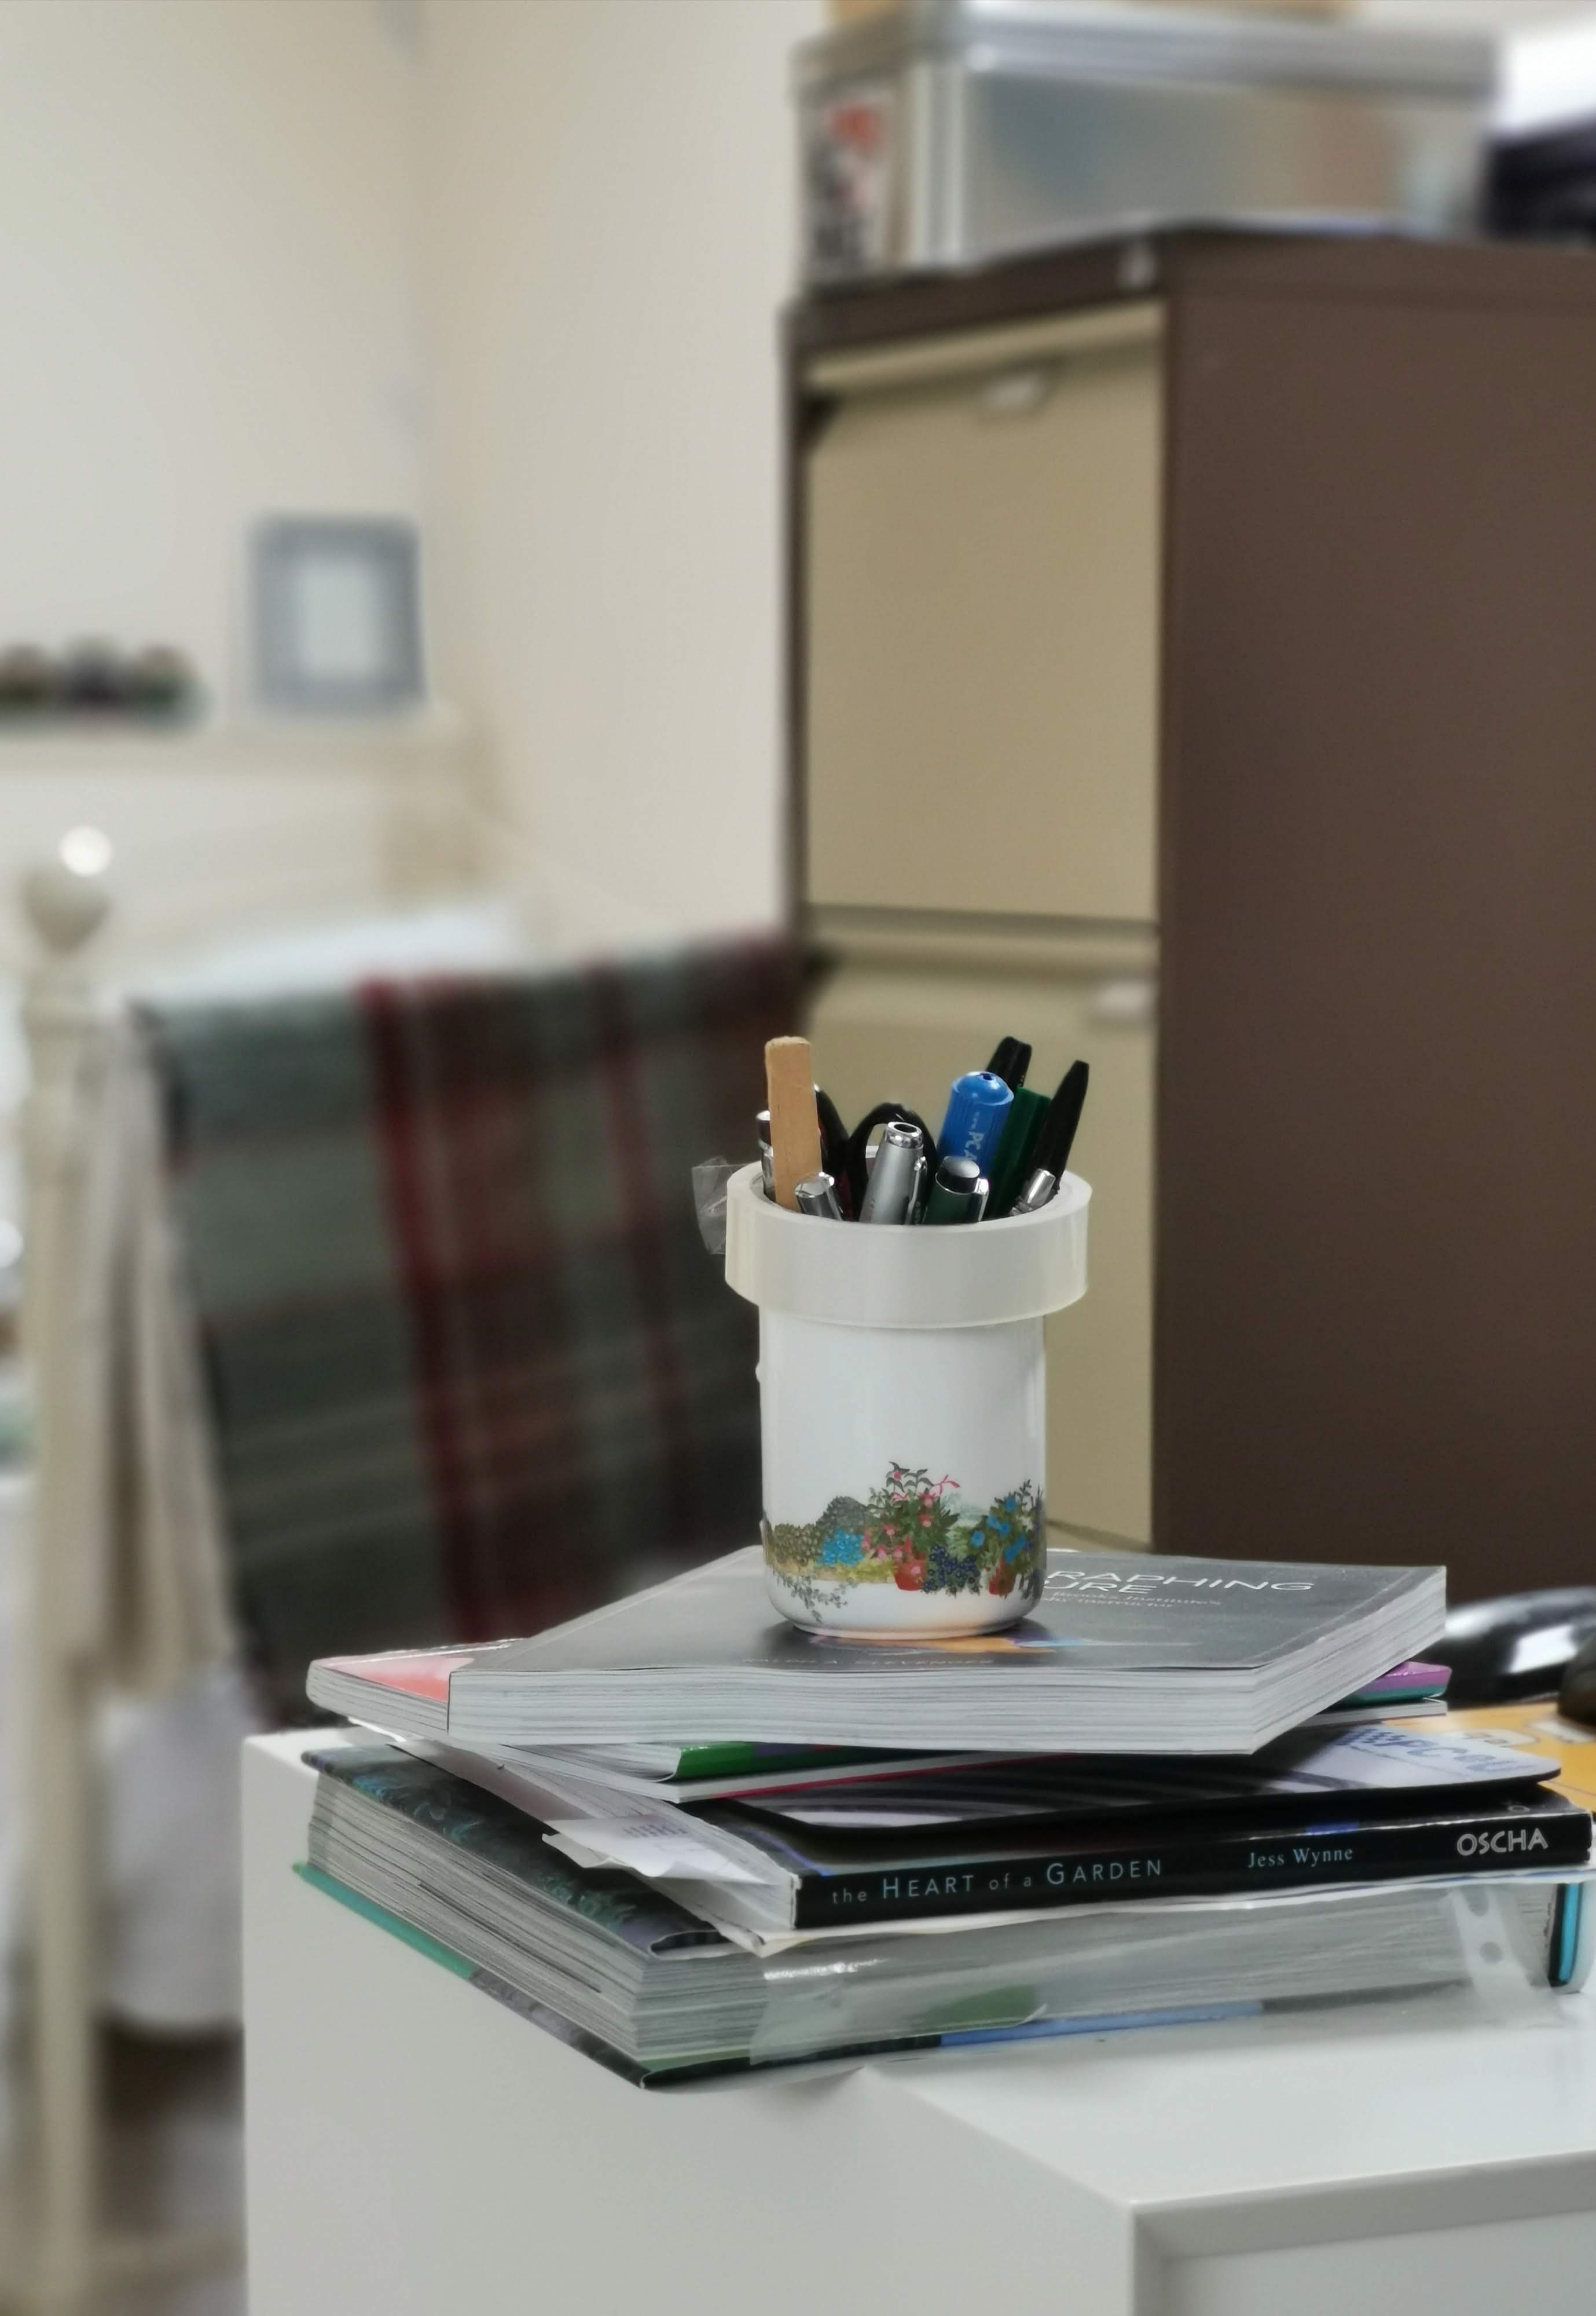
(please click on an image to enlarge)
(1) F/0.95 – a shallow depth of field (low) where the focus is on the mug of pens and the background is very blurred.

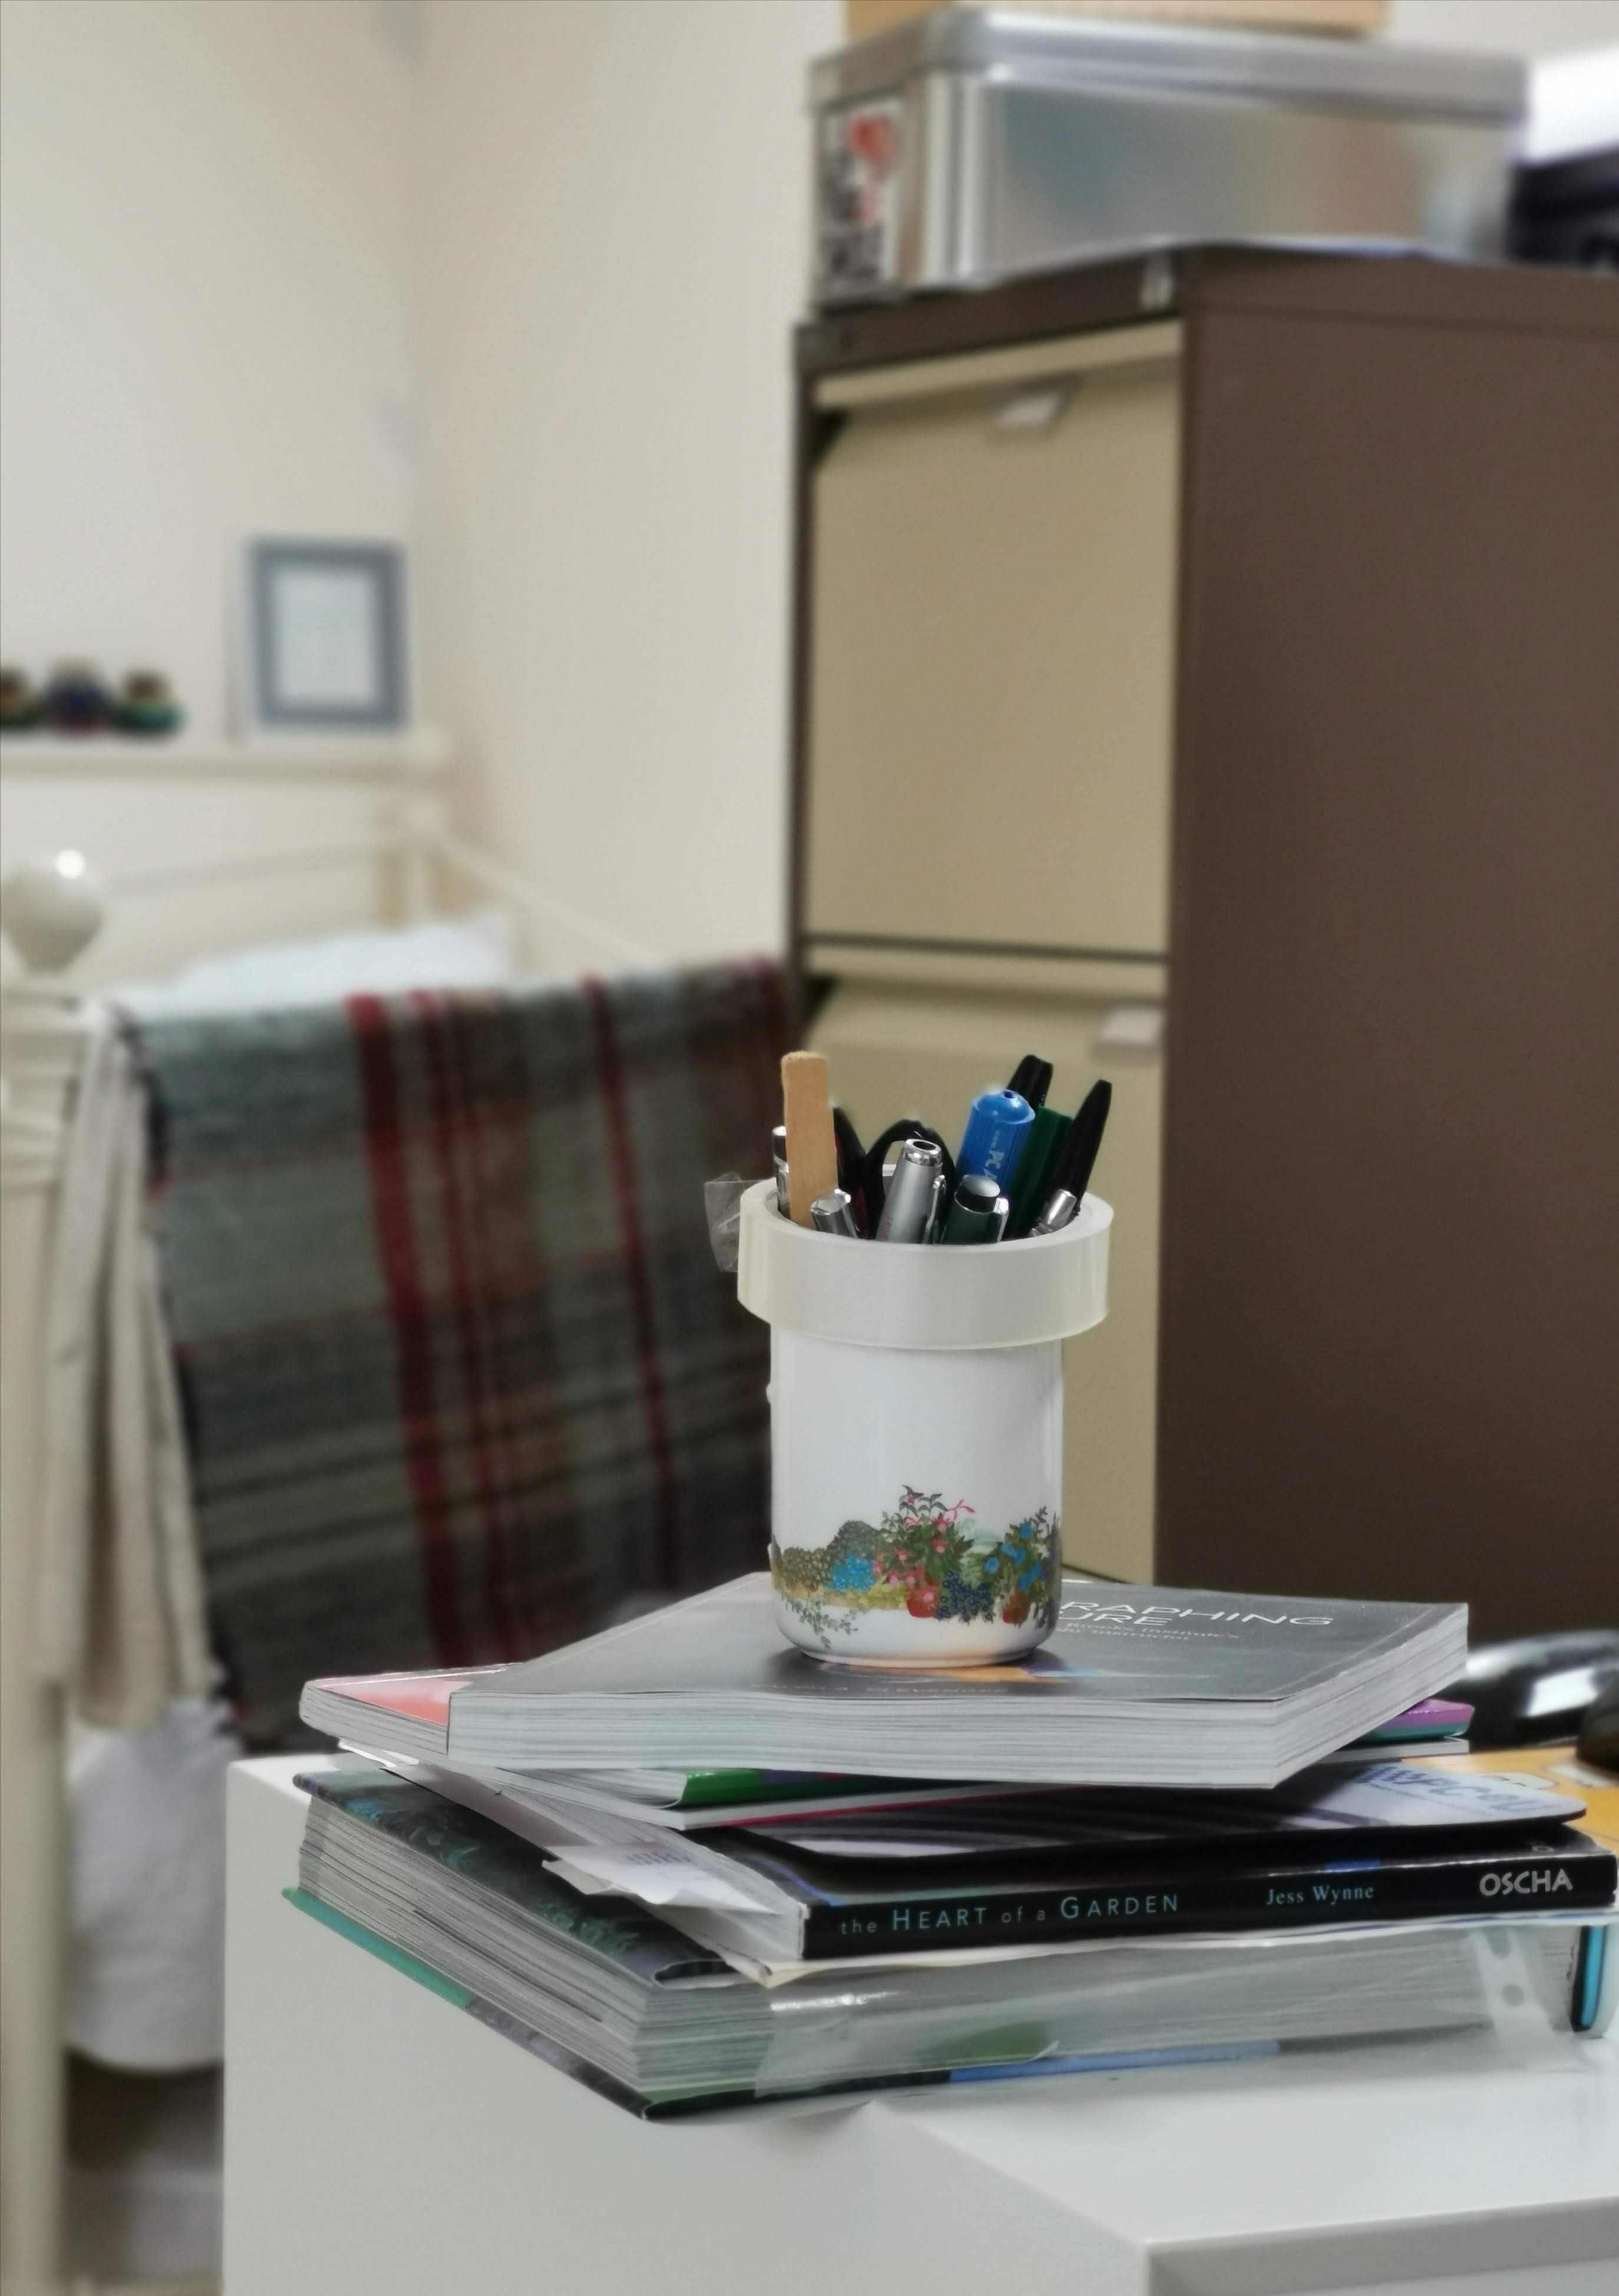
(2) F/ 4.5 – an intermediate depth of field (medium) where the focus remains on the mug of pens, but the background is more in focus and you can start to make out shapes.

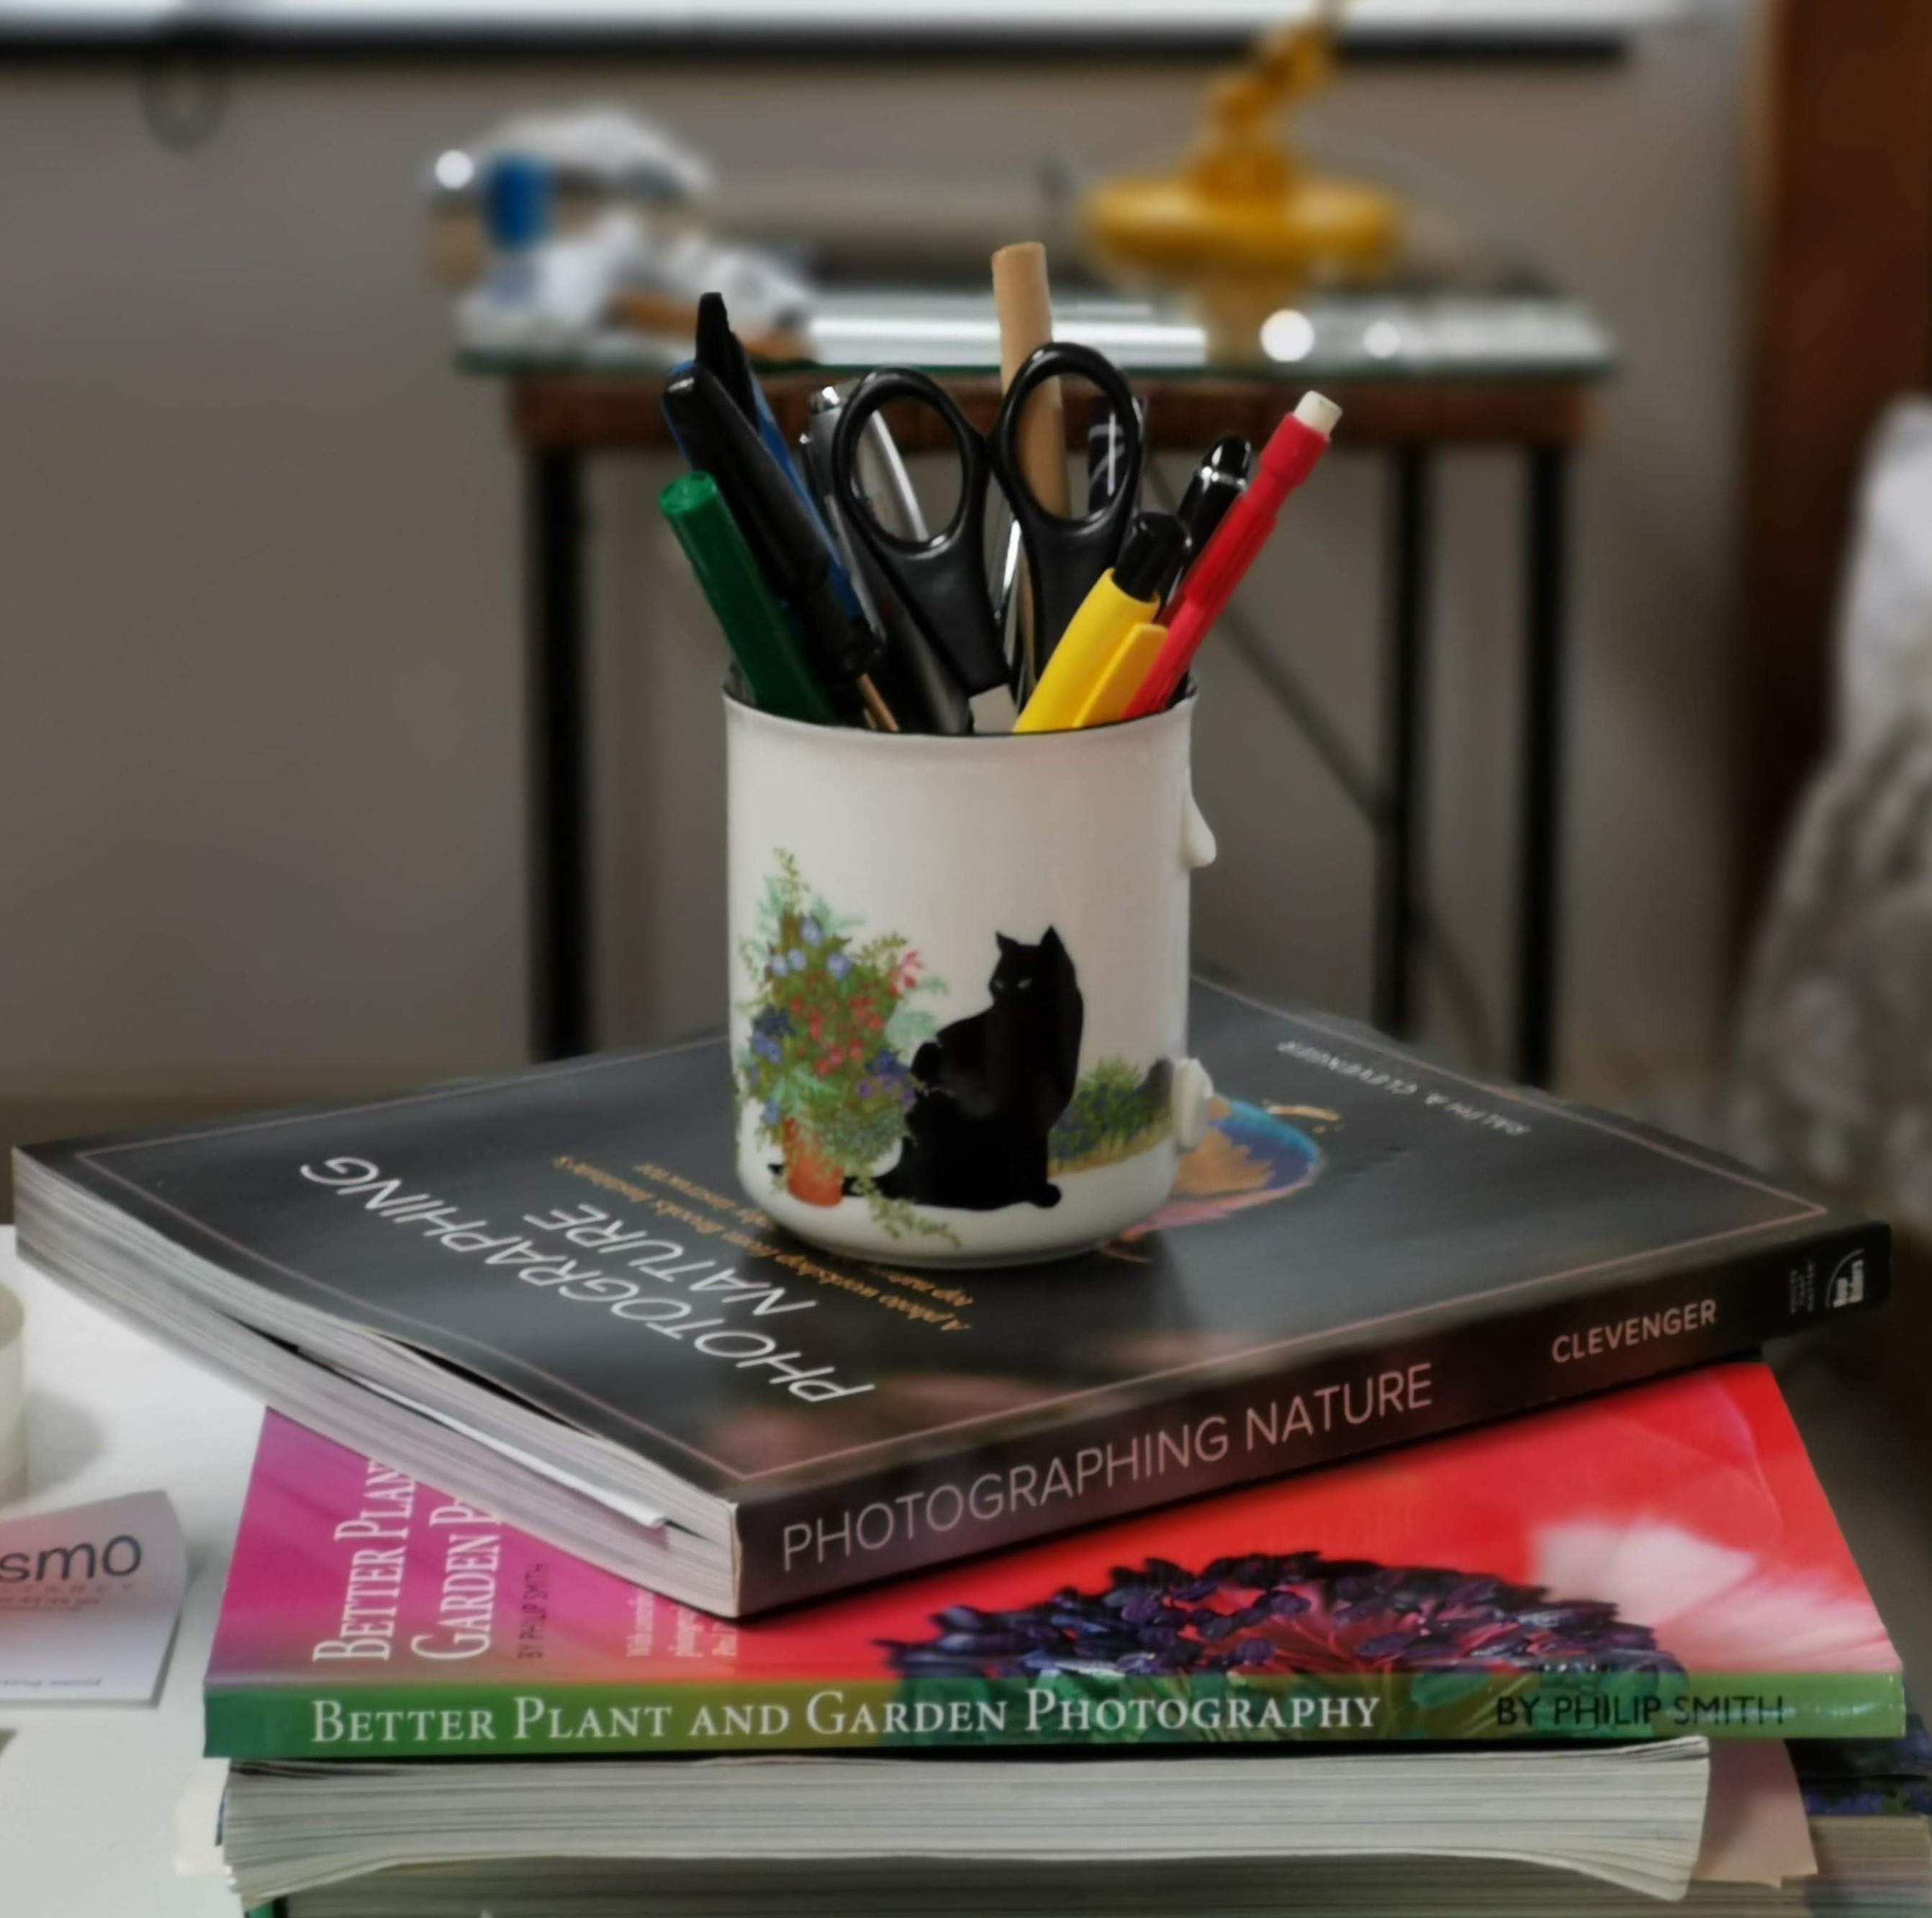
(3) F/16 – a deep depth of field (high) where not only is the mug of pens in focus but you can now make out the table and the base of the lamp in the background. Everything is in focus.
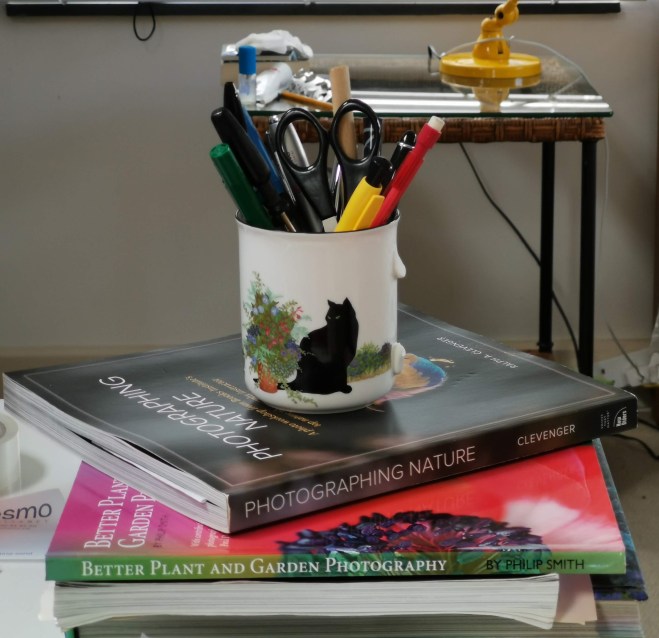
My favourite is the shallow depth of field where the mug of pens is sharp and clear and the background does not distract you from the subject, whereas in the deep depth of field the objects behind the mug become intrusive.
If you would like to join in with the 2020 photo challenge then please take a look at my 2020 Photo Challenge page. No complicated rules, just a camera required 🙂
-
- Create your own post with some information about how you composed the shot.
- Include a link to this page in your post so others can find it too
- Add the tag #2020PhotoChallenge so everyone can find your entry easily in the WP Reader
- Get your post(s) in by the end of the month, as the new theme comes out on the first Sunday in July.